OUTLOOK can be customised extensively in order to fit into an individual’s work pattern. The following sections give a quick insight into the possible changes that can be made to make your experience as psychedelic as you’d like. Possible customisations are categorised as follows:
1. OUTLOOK Bar with Groups & shortcuts.
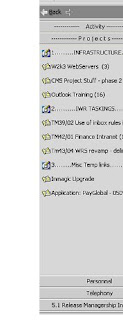
The OUTLOOK bar enables any OUTLOOK folder of file link to be added as a shortcut to this bar.In OUTLOOK if you chose View / Outlook Bar, a grey bar will appear on the left hand side of your screen.

Groups… To Add a Group: Right mouse click on the grey area and “Add New Group”, you can call it whatever you like, but the order of that group will not change.
To Rename a Group: Right mouse click on the grey area and “Rename Group”.
Short Cuts…
These are links to your mapped folders in OUTLOOK or accessible files on a file server. To Add a new Shortcut: Right mouse click on the grey area and “OUTLOOK bar shortcut”, you can call it whatever you like and then point out to the appropriate OUTLOOK folder of File System Folder/File accordingly.
2. Current View Customisation with Mailboxes.
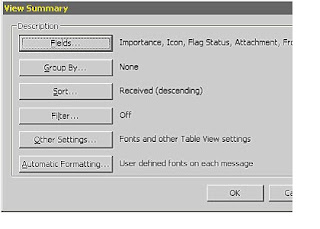
Mailbox views in OUTLOOK can be customised quite heavily. These can roughly be categorised accordingly;

a. Fields
This view enables any OUTLOOK field to be viewed in your default view. The default view shows the “Frequently Used Fields”, to show all select “ALL Mail Fields.
Once you have all the fields chosen, the order can be changed by selecting the right hand column and using the Move up and Move down buttons.
b. Group By
This enables your inbox to be categorised by selecting up to three grouping categories.
Once chosen this creates a grey box at the top of your inbox with the appropriate grouping schema. This can easily be changed by dragging the appropriate box off this area or re categorising by dragging it down the hierarchy listing.
c. Sort Filter
This is the most basic of customisation and allows entries in the inbox to be sorted accordingly. A small triangle appears in the category heading line to signify that the column has been sorted.
To refine the sort, please click on the category title and this will resort and change the direction of the arrow accordingly (Up arrow - Ascending, Down Arrow - Descending).
d. Other Settings
This choice allows you to set the default font and size for your OUTLOOK Email box. You can also display gridlines around the cells to make viewing a lines’ entry slightly easier.
e. Automatic Formatting
This is by far the most powerful option. You can set a number of rules up to colour code items based on certain criteria.
E.g.: a rule can be entitled “read receipt requested” with the following options identified:
i. Font = 8 point Tahoma RED
ii. Condition / Advance tab = Field > All mail fields > “Receipt Requested” equals “YES”
3. Other customisation tips:
1. By right mouse clicking on the grey date bar on the top of your calendar view and choosing “automatic formatting”, you are able to customise the default view quite extensively.
e.g.: To make all my personal entries with LUNCH in the subject = GREEN, the following condition can be applied
1. Name of the condition = personal
2. Colour for this condition = green
3. Press the “Condition button” / go to the advanced tab.
a. In the field combo box select “All mail fields” & subject
b. Condition = “contains”
c. Value = "LUNCH"
4. “Add to the list” (other additions can be added as well!)
5. finish by closing the dialog box by selecting Ok x2
All 'LUNCH' entries should now be green!
let me know how it goes. It's a great tool and over the next few posts I'll elaborate on other Outlook tips & tricks.
 Digg/samejreltub
 Flickr/samejreltub
 Facebook/James Butler
 Linkedin/JamesFraserButler
 Twitter/samejreltub
 YouTube/samejreltub
 Del.icio.us/samejreltub
 GMail/James Butler
 Blog/James Butler
No comments:
Post a Comment